HubSpot Integration Setup Guide
Last updated: 1 june 2026
Connect your HubSpot account to Klarion and start importing support tickets for analysis.
Step 1: Open Integrations in Klarion
- Log in to Klarion using your admin credentials.
- Click Settings in the bottom-left of sidebar and go to Integrations
- Find HubSpot in the CRM integrations section and click Connect.
Step 2: Connect Your HubSpot Account
- You’ll be redirected to HubSpot’s login page. Sign in to your HubSpot account.
- If you have multiple portals, select the correct HubSpot account to connect.
- Click Connect app to grant Klarion access
Klarion only reads ticket-related data. No data is written back to HubSpot.
Step 3: Configure HubSpot Import
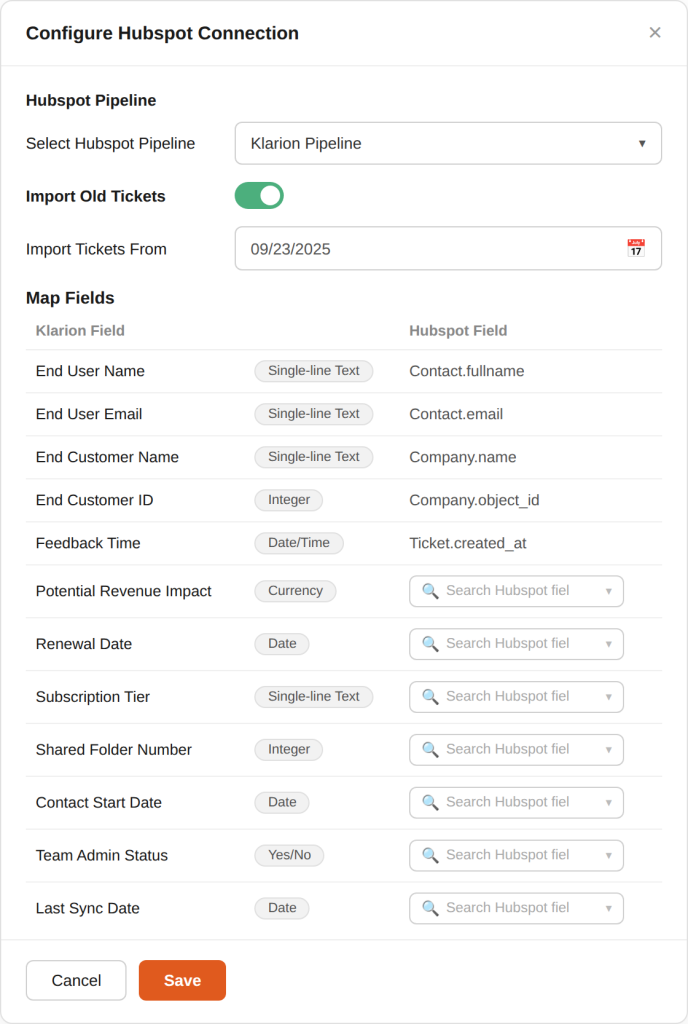
- Select the HubSpot pipeline you want to import (e.g. Support Pipeline, Sales Pipeline).
- Choose a start date to import tickets from that point onward.
- Or select the option to import all available tickets and pull your full ticket history.
 Choose your HubSpot pipeline, set your import start date, and map contact, company, and ticket fields to Klarion.
Step 4: Map Fields, Save and Start Import
- Default Klarion fields are pre-mapped out of the box.
- Map any additional HubSpot fields you need. Field mapping can be updated at any time.
- Click Save. The ticket import starts automatically and runs in the background.
Setup Complete
- HubSpot shows as Connected in your Integrations settings.
- Tickets begin appearing in Klarion automatically.
- Field mappings are saved and active.
- Import is running in the background.
Need help?
Contact us at support@klarion.ai